
Often we need to automate moving files between blob storage in azure and the disks on our servers. Managing credentials in this scenario can be a challenge. In this post, I will show you how to overcome this with azcopy and System Assigned Managed Identities.
Download AZ Copy from here
https://docs.microsoft.com/en-us/azure/storage/common/storage-use-azcopy-v10
Unzip it and add it to your path.
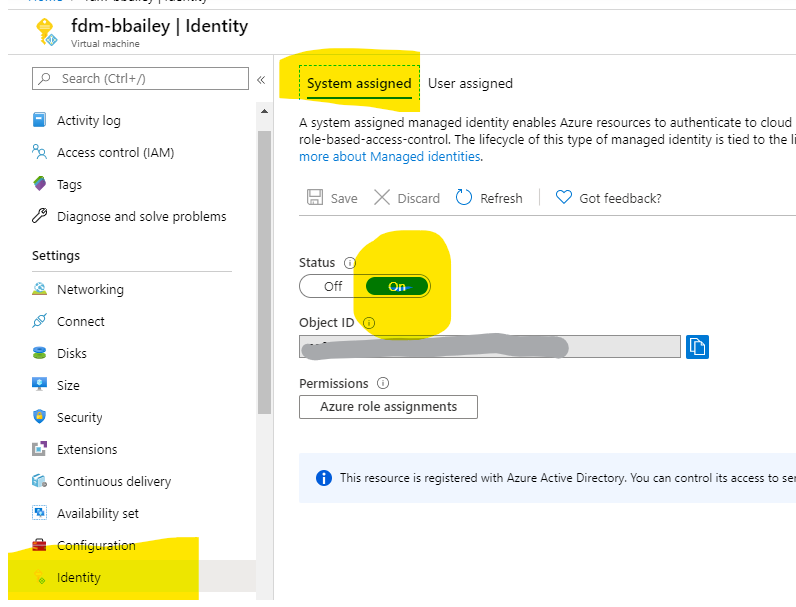
Assign A Identity
Enabling a system assigned managed identity is much simpler than the name would suggest. Simply open your VM in the azure portal Click Identity on the left hand side and toggle the status switch on then Save.
Assign Roles
Goto the storage account in the azure portal.
Go into Access Control (IAM) and Click Add / Add Role Assignment

Then Give the role “Storage Blob Data Contributor” to the virtual machine and click Save

Use the Managed Identity with AZCopy
First login to azcopy using the System Assigned Managed Identity.
azcopy login --identityThis may not work right away as It takes several for the role assignments to ripple through the system to allow login request to succeed. In my case it took 5 minutes. The easiest way to test is to use azcopy to list some files. Note that we do not need to pass credentials
azcopy list https://mystorageaccount.blob.core.windows.net/mycontainerEach windows user will need to login to azcopy with the identity before using it for the first time. After that, it is not necessary. If you are writing a script which will be executed by a service account then include the login command at the start of the script to ensure it gets called.
Once you are logged in its pretty easy to copy files to blob storage without passing credentials each time
azcopy copy c:\export\sql-data-load\*.csv https://mystorageaccount.blob.core.windows.net/sql-data-loadExamples written using AzCopy v10